How to generate HAR files in Chrome, Firefox & Safari?

HAR, short for HTTP Archive, is a format for tracking information between web browsers and websites. A HAR file can identify performance issues, such as bottlenecks, slow load times, and page rendering problems.
HAR exporting is available in most modern web browsers. In this blog, we’ll explain how to generate a HAR file in popular browsers for debugging website issues.
Google Chrome
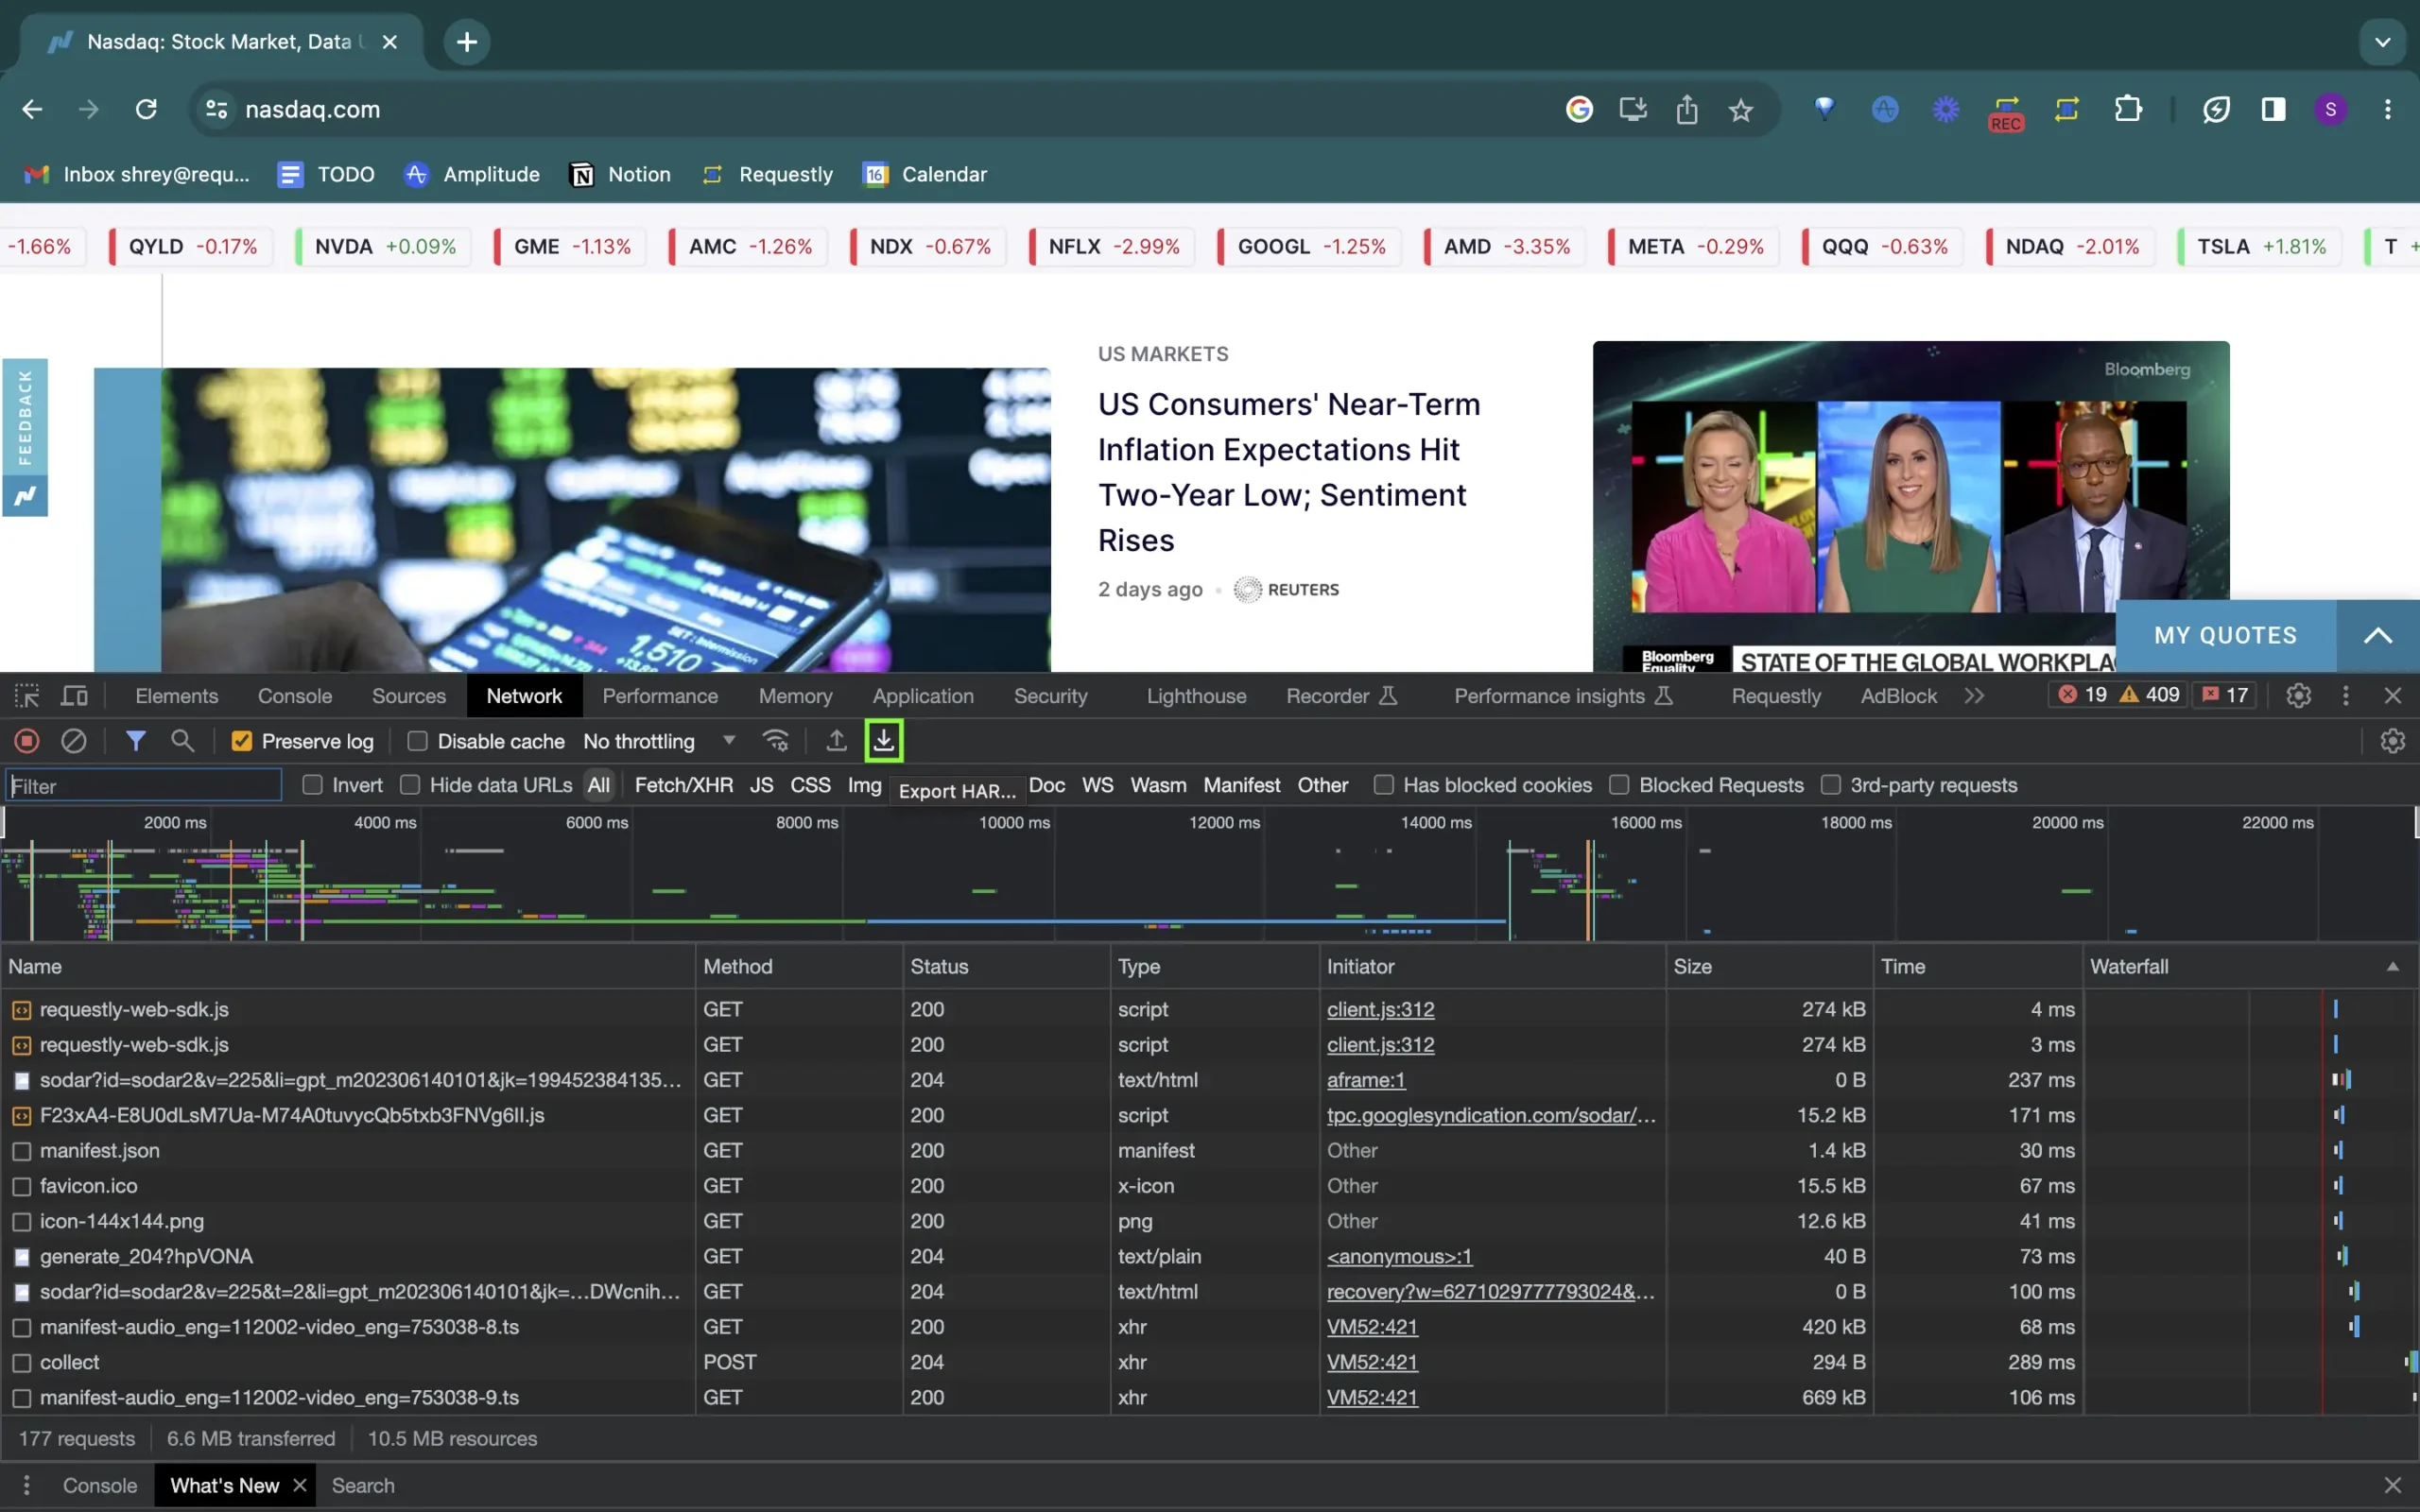
- To open the developer console in Google Chrome, open the Chrome Menu in the upper-right-hand corner of the browser window and select More Tools > Developer Tools.You can also use Shift + ⌘ + C (on macOS), or Shift + CTRL + C (on Windows/Linux).
- In the Developer Tools panel, choose the Network tab.
- Check the “Preserve Log” and Disable cache checkboxes to record all interactions.
- Refresh the page.
- Click the “Export HAR” (down arrow icon) to export the HAR file.

Safari
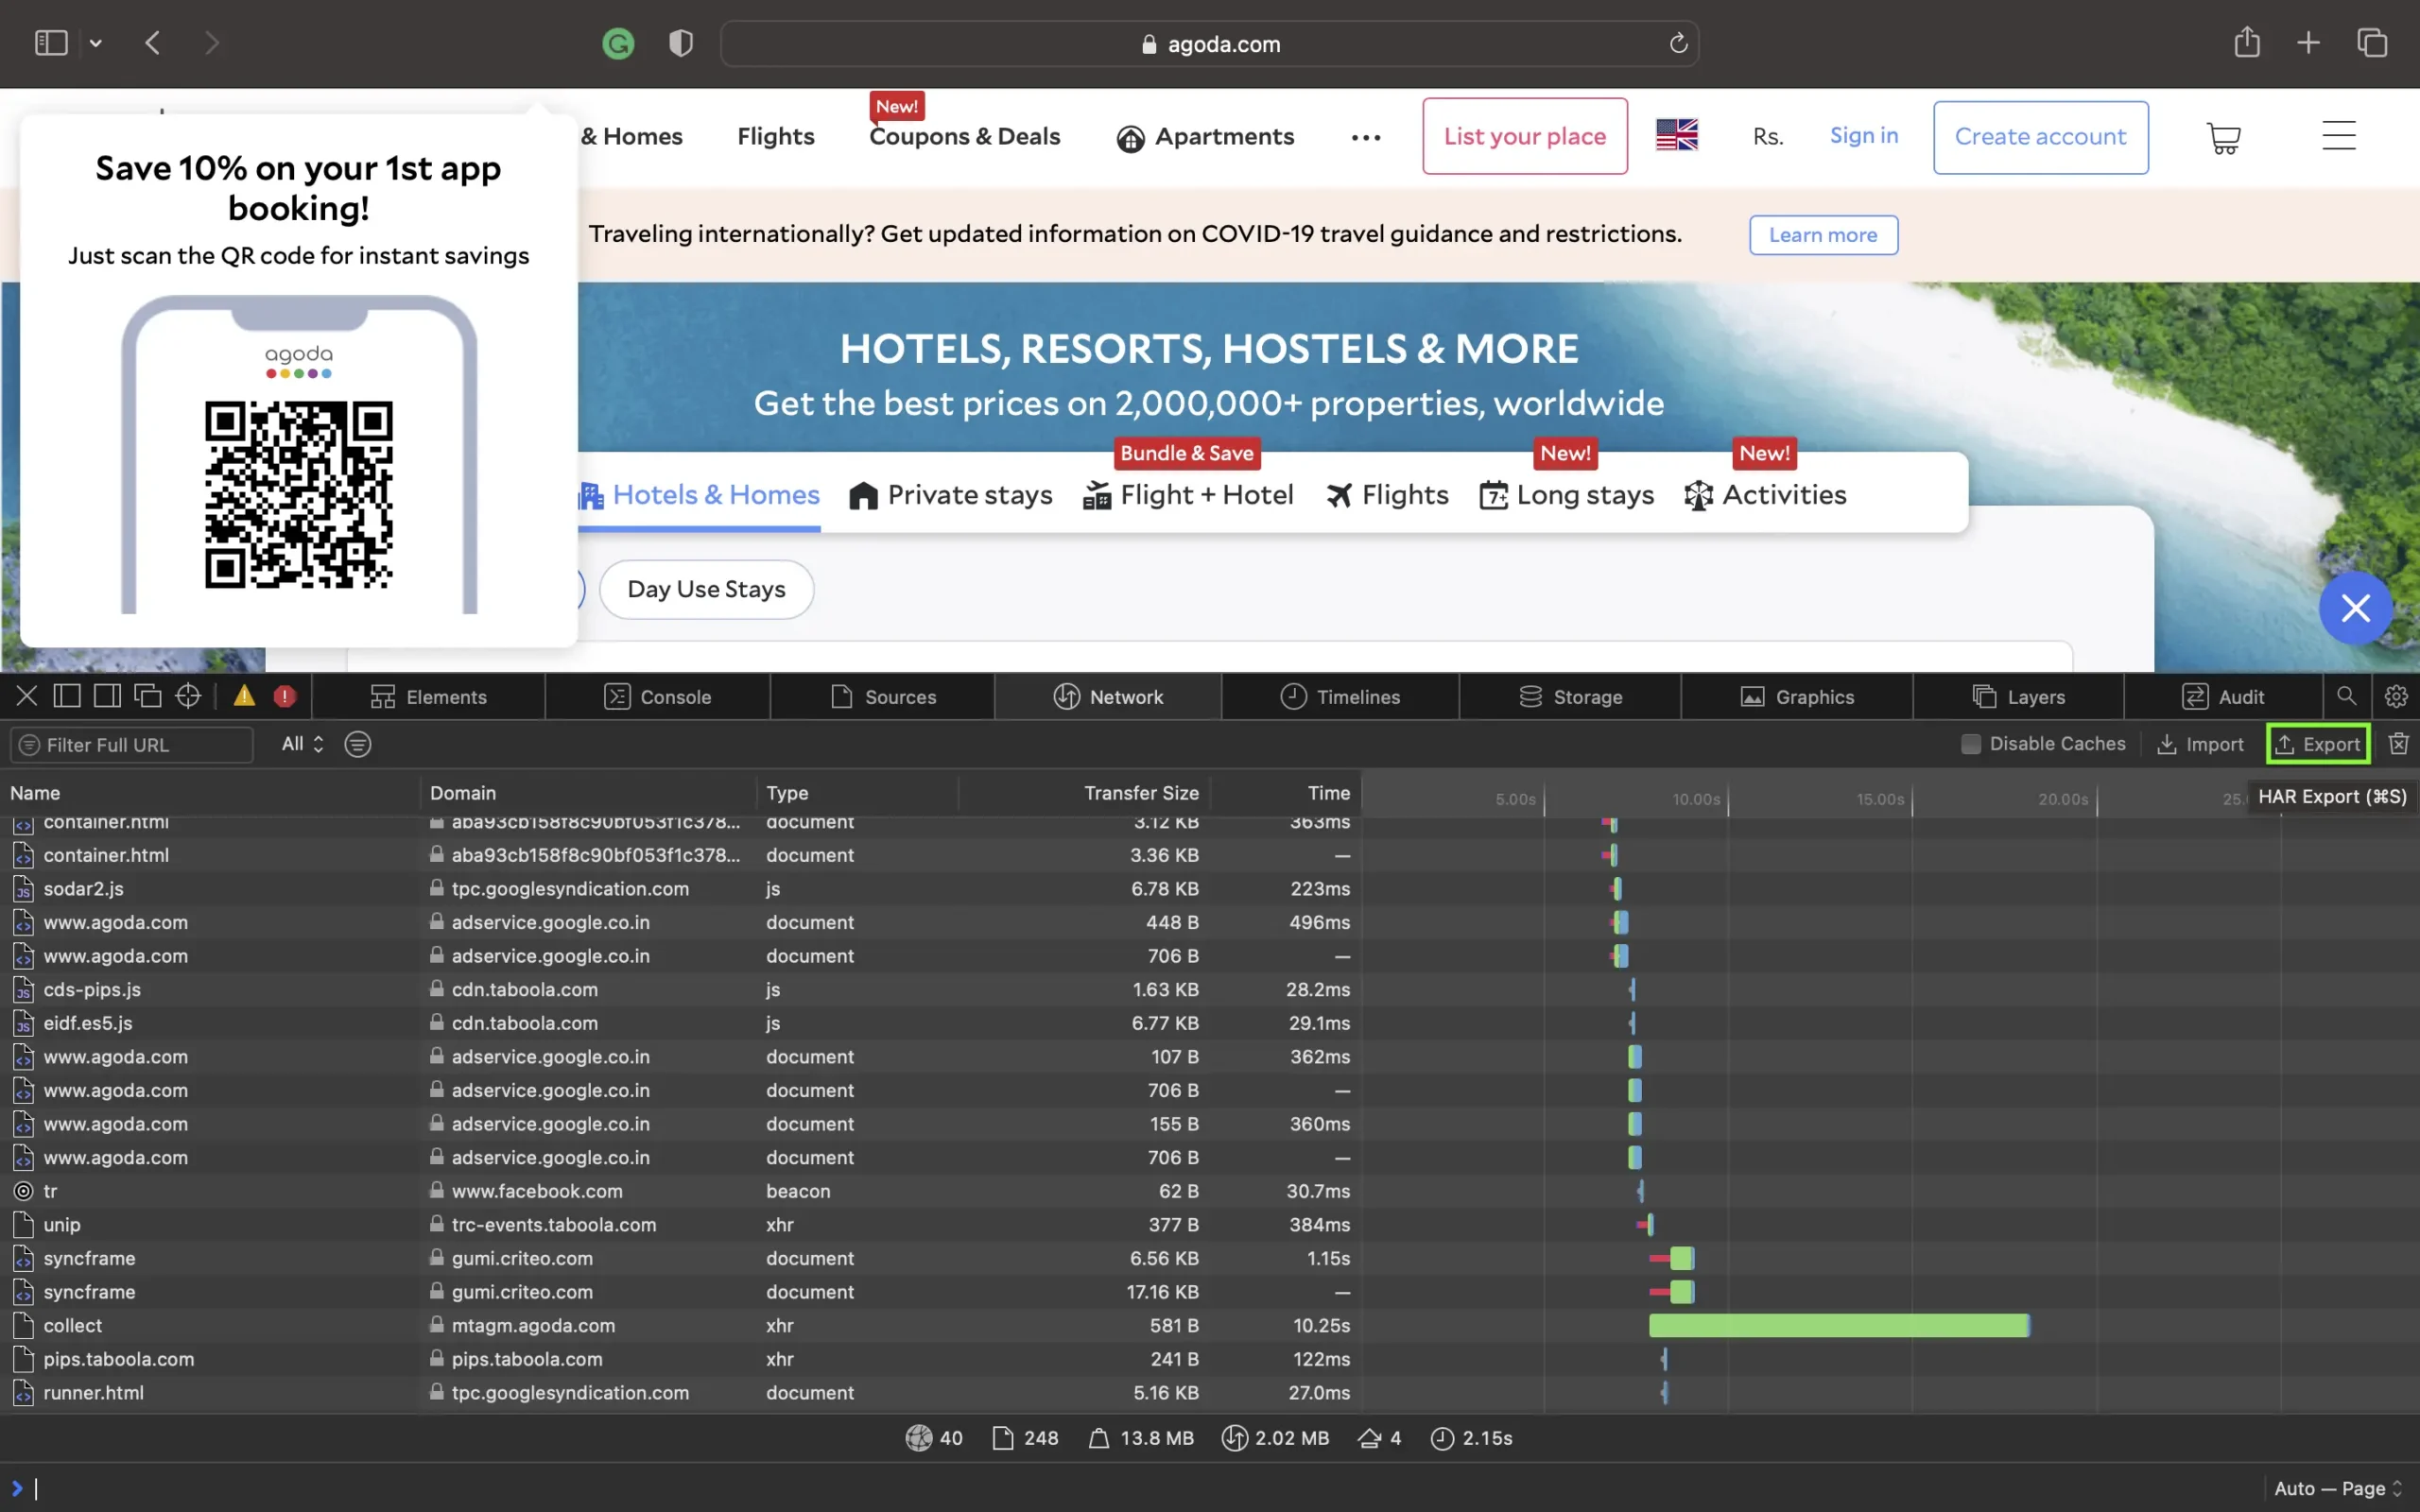
Ensure the ”Show Develop menu” in the menu bar is checked under Safari > Settings > Advanced tab.
- Visit the web page from where you want to export the traffic.
- Click Develop on the Menubar, then select Show Web Inspector. Refresh the page.
- Go to the Network tab and click Export on the upper right side of the pane.

Firefox
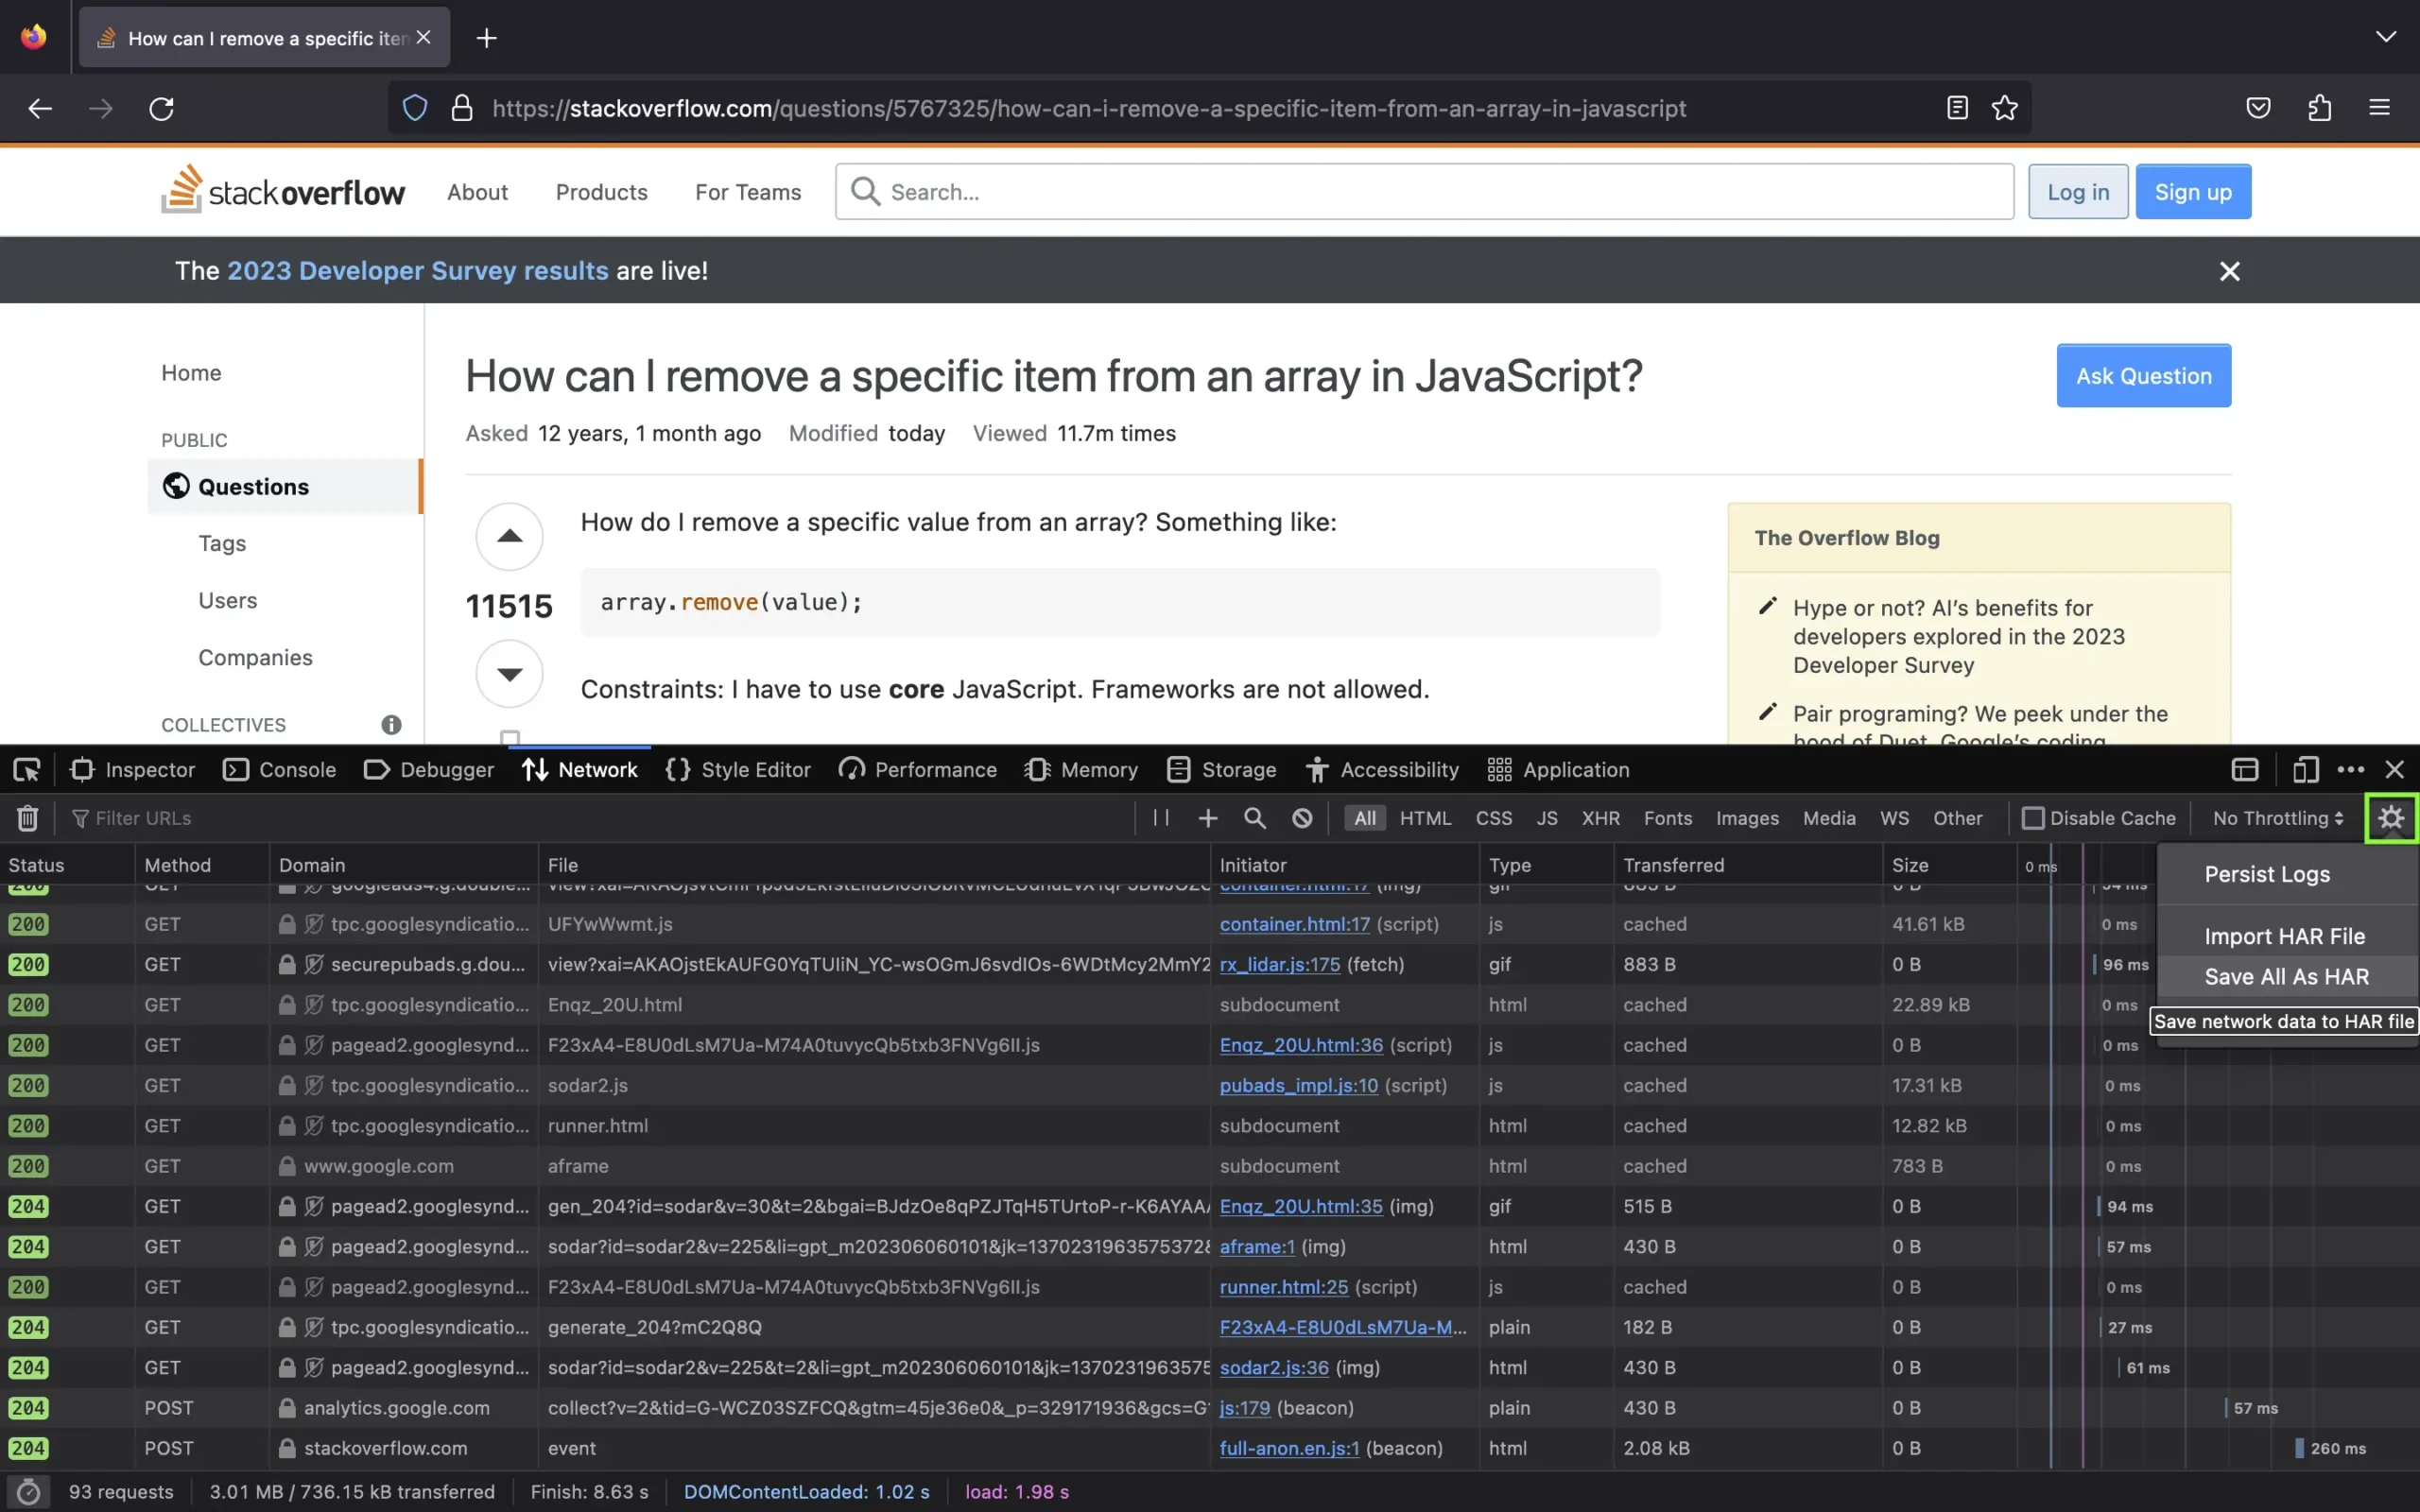
- To open the developer console in Firefox, click on the Firefox Menu in the upper-right-hand corner of the browser and select More Tools > Browser Console. You can also use Option + ⌘ + E (on macOS) or Shift + CTRL + C (on Windows/Linux).
- Refresh the page.
- Go to the Network tab and, click the settings icon (upper right side of the panel), choose Save All As Har.

Generating HAR file using Requestly
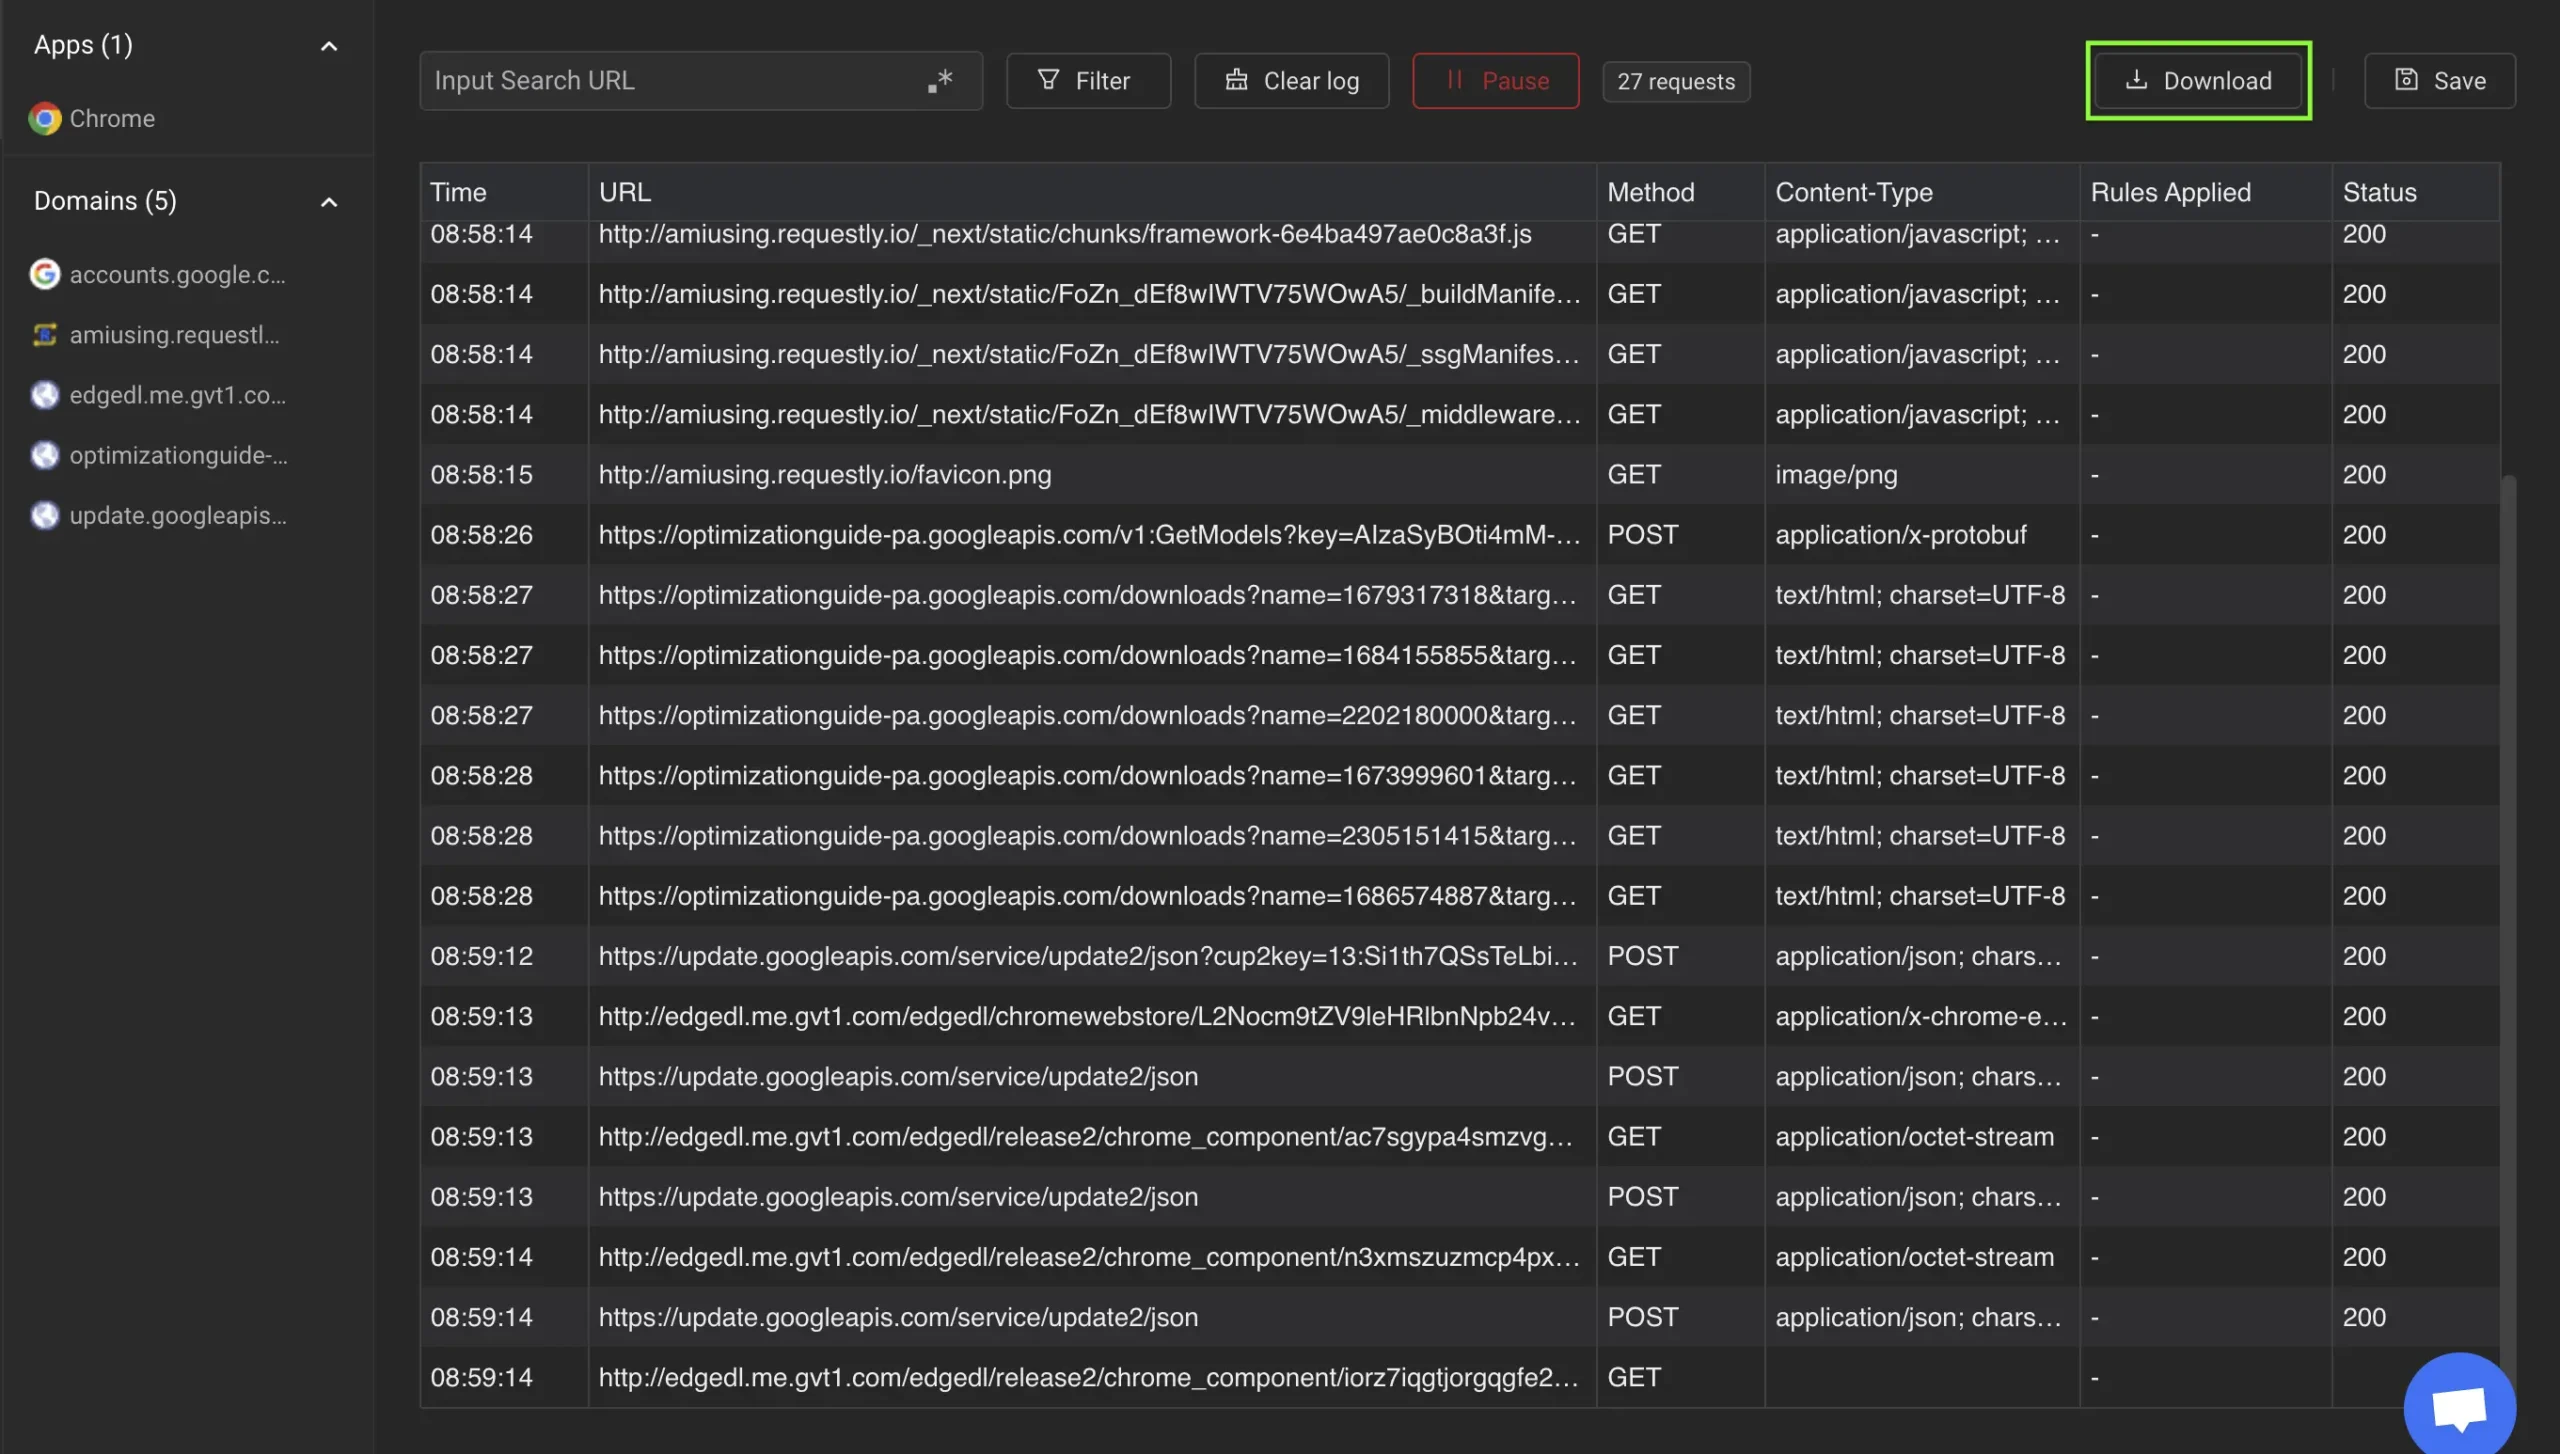
You can also use Requestly’s traffic inspector to inspect traffic and save or download a session as HAR for analysis and debugging to be done. Generating a HAR file in Requestly is very easy, just a one-click thing.
- Open Requestly Desktop App and connect an app to get started. Network interception will start automatically.
- Click Download to get the HAR file, which can further be shared with your teammates.

Additionally, you also have the option to save sessions directly in Requestly. These saved sessions will appear under the Sessions tab on the left side menu. You can use those saved sessions for debugging purposes.
Subscribe for latest updates
Share this article
Related posts


